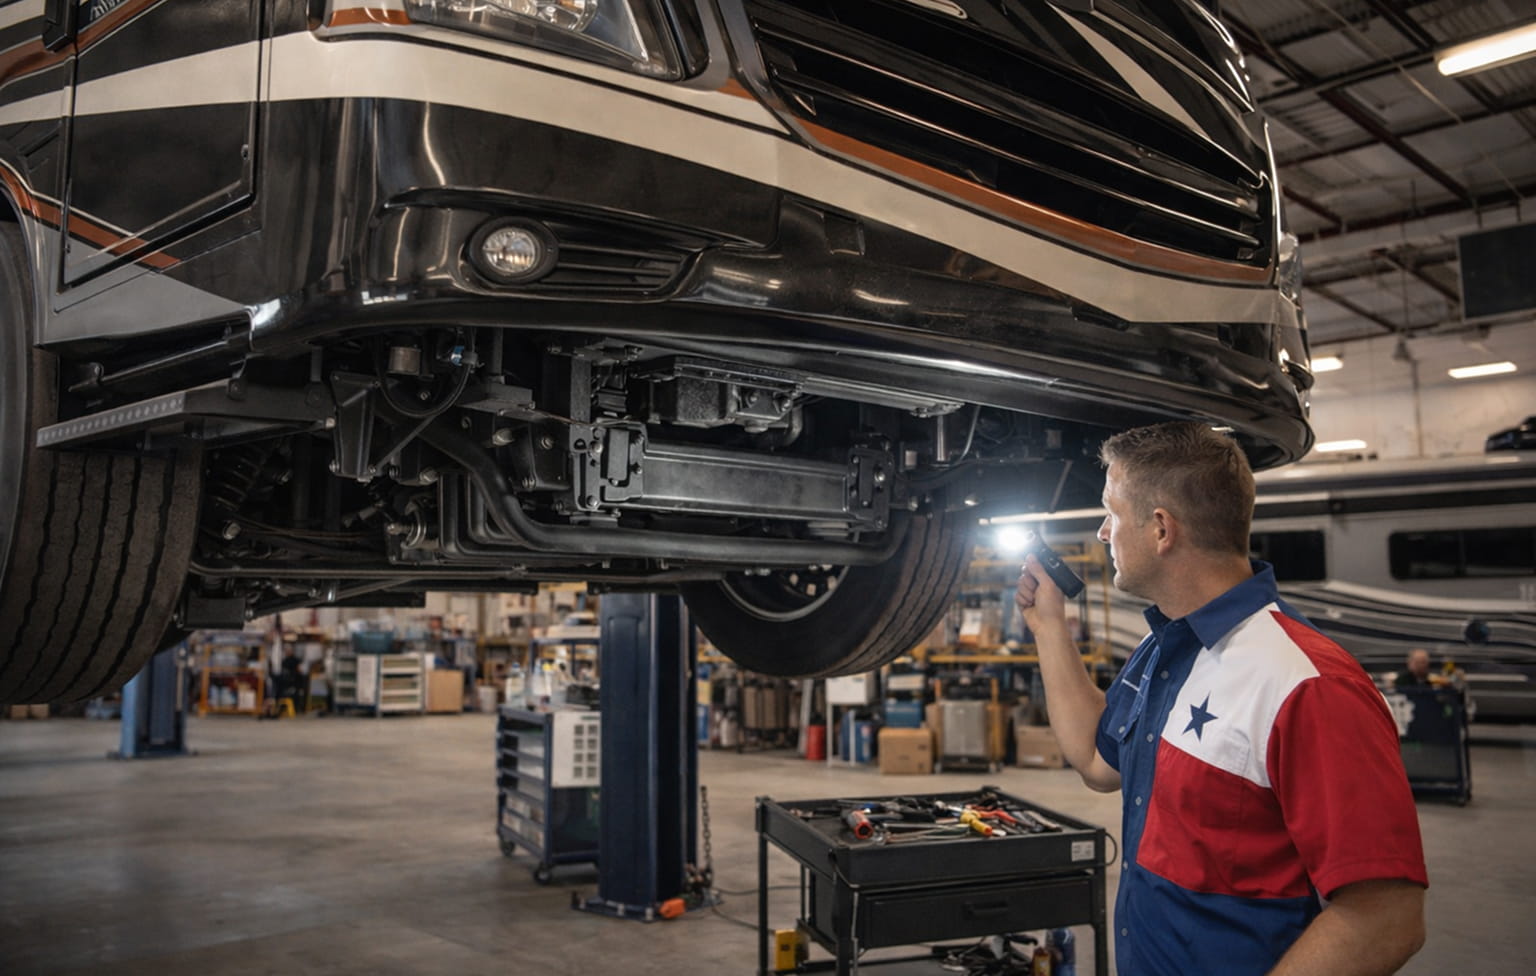
If you plan to keep your motorhome for five years or more, the chassis deserves more attention than it got in the early years. Most owners focus on the coach first. They look at the roof, appliances, flooring, and slides. Those matter, but the chassis carries all of it. It takes the weight, road shock, heat, moisture, and vibration mile after mile.
That long-term stress usually starts showing underneath the RV before it becomes obvious above ground. A small crack at a mount, a worn suspension bushing, or a leaking wheel seal can stay hidden for a long time. Then one day the coach starts wandering, the ride height changes, or the tires wear unevenly.
This guide explains how to inspect the frame, mounts, and stress points that matter most for long-term owners. It also explains what you can check yourself, what should go to a professional, and when to schedule a deeper inspection before a trip or after a major road event.
Key Takeaways
- Inspect the RV chassis closely after about five years of ownership. Aging components, vibration, and road stress can cause frame cracks, worn suspension parts, and mounting issues that may not appear during normal walkarounds.
- Start with the structural areas that carry the load. Check frame rails, welds, crossmembers, body mounts, hitch supports, and rear overhang sections for rust, cracks, bent brackets, or shifting hardware.
- Use the undercarriage to spot early warning signs. Look for fluid leaks, loose wiring, damaged exhaust hangers, worn bushings, and scraped components, since many problems show up underneath first.
- Watch for driving symptoms that signal chassis wear. Signs such as uneven tire wear, wandering steering, new rattles, sagging ride height, or recurring alignment issues often point to suspension or frame problems.
- Combine owner checks with professional inspection. Visual checks help catch early wear, but lift-based inspections, brake measurement, steering testing, and frame evaluation should be handled by an experienced RV service shop.
Why chassis inspections matter more as an RV ages
The maintenance picture changes as a motorhome gets older. Rubber hardens. Fasteners loosen. Road spray reaches areas you never see during a normal walkaround. Heat cycles and storage time both add wear. Freightliner’s recreational vehicle chassis maintenance manual and owner resources both make the same point in different ways: a motorhome chassis needs regular inspection and scheduled maintenance because many components age from both mileage and time, not just miles driven.
A good chassis inspection protects:
- safety
- ride quality
- tire life
- steering response
- brake performance
- resale value
For long-term owners, a deeper inspection usually makes sense around year five, before a major trip, after rough-road travel, after long storage, or any time you notice new suspension or steering symptoms. Freightliner also publishes interval-based schedules for RV chassis service, including lubrication points, steering, suspension, cooling, and underbody checks, which supports using time-based inspections even when mileage is low.
If you want a broader coach-level safety routine to pair with this underbody review, use a structured checklist like this 15-point RV safety inspection checklist as your companion process.

What the RV chassis actually includes
When people say “chassis,” they often mean more than just the frame rails. On a motorhome, the chassis includes:
- main frame rails
- crossmembers
- body and house mounting points
- suspension mounting hardware
- steering linkages
- axles
- brake components
- undercarriage wiring, hoses, and line routing
There are also motorhome-specific stress areas that deserve extra attention:
- rear overhang sections
- generator and fuel tank supports
- hitch and towing points
- front suspension and steering areas
- the body-to-chassis interface where the house structure sits on the frame
For Ford-based gas coaches, Ford’s F-53 owner manuals and motorhome guide are useful because they identify service points, filters, belts, battery and chassis items, and model-specific layout information that helps owners know what is normal for their platform before they inspect for problems.
Frame and structural areas to inspect first
Start with the frame rails and crossmembers. Look for:
- rust scaling or flaking
- cracks near welds
- bent brackets
- collision or scrape damage
- fresh metal exposure
- uneven or shifted mounting points
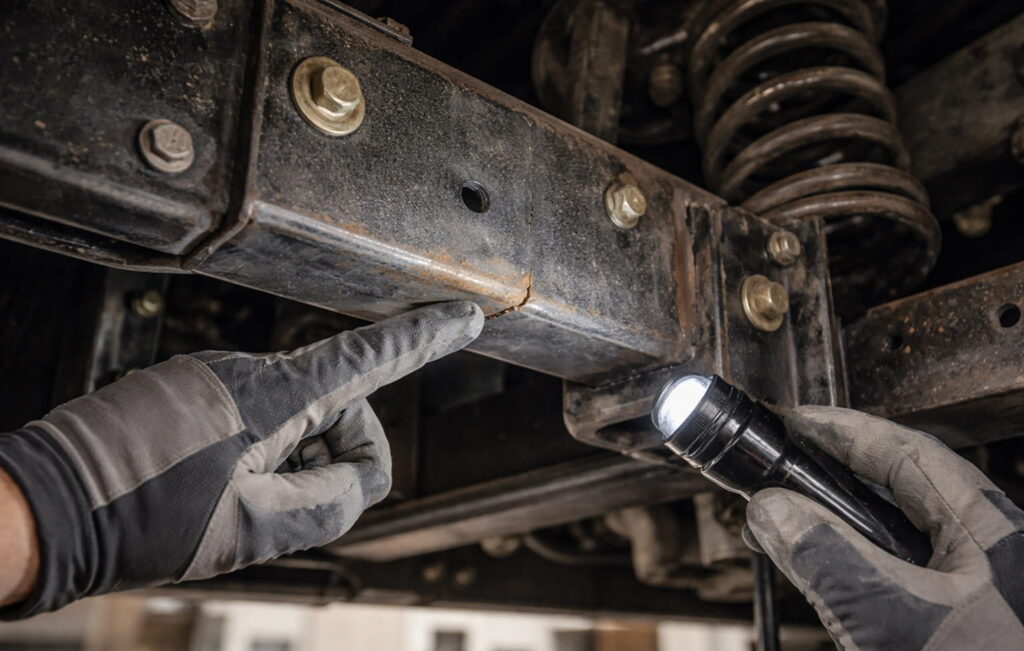
Pay close attention to welds and joints. These areas carry stress concentration. Small cracks there can grow slowly and change the way loads move through the chassis.
Next, inspect body and house mounts. Repeated flex at these points can create rattles, uneven wear, and even alignment problems. Loose fasteners, worn mounting bushings, or visible movement between the coach body and the chassis should not be ignored.
Then move to the rear. Long rear overhangs often scrape on steep driveways, fuel station aprons, and uneven exits. Check the back edge of the frame, the generator area, and rear supports for bending, cracked welds, or hardware damage. The same applies to hitch and tow-related stress. Inspect tow bar brackets, receiver mounts, and surrounding frame metal for cracks or distortion.
Common motorhome frame damage signs
Frame or chassis damage does not always announce itself clearly. Some of the first signs are visual, while others show up while driving.
Visible signs include:
- rust flaking
- hairline cracks near welds
- bent supports
- shifted brackets
- worn or crushed body mount areas
- scraped, fresh metal where the underbody contacted pavement
Driving symptoms that may point to chassis or frame wear include:
- new rattles from below
- uneven ride height
- repeated alignment problems
- a pull or wander that keeps returning
- unusual sway or handling changes
These issues matter because small structural changes affect suspension geometry and brake behavior. A frame rail does not need to be visibly “bent” in a dramatic way to cause real handling problems. Minor distortion or looseness at a mounting point can change how weight transfers through the coach.
Why the undercarriage tells the real story
The undercarriage often reveals the truth faster than the exterior. Leaks, rust, abrasion, and neglected wear show up underneath long before they become major symptoms inside the coach.
During an rv undercarriage inspection, look for:
- wet spots and residue from engine oil, coolant, or transmission fluid
- loose or hanging wire harnesses
- torn loom or rubbing points
- damaged exhaust hangers or rusted sections
- fuel tank dents or support corrosion
- line routing that looks unsecured
- road impact marks on shields, tanks, brackets, and low-hanging components
A clean undercarriage makes this easier. That is one reason chassis service is such a good inspection window. Once the coach is clean and on level ground, a bright flashlight reveals far more than a quick crawl on a dusty lot ever will.
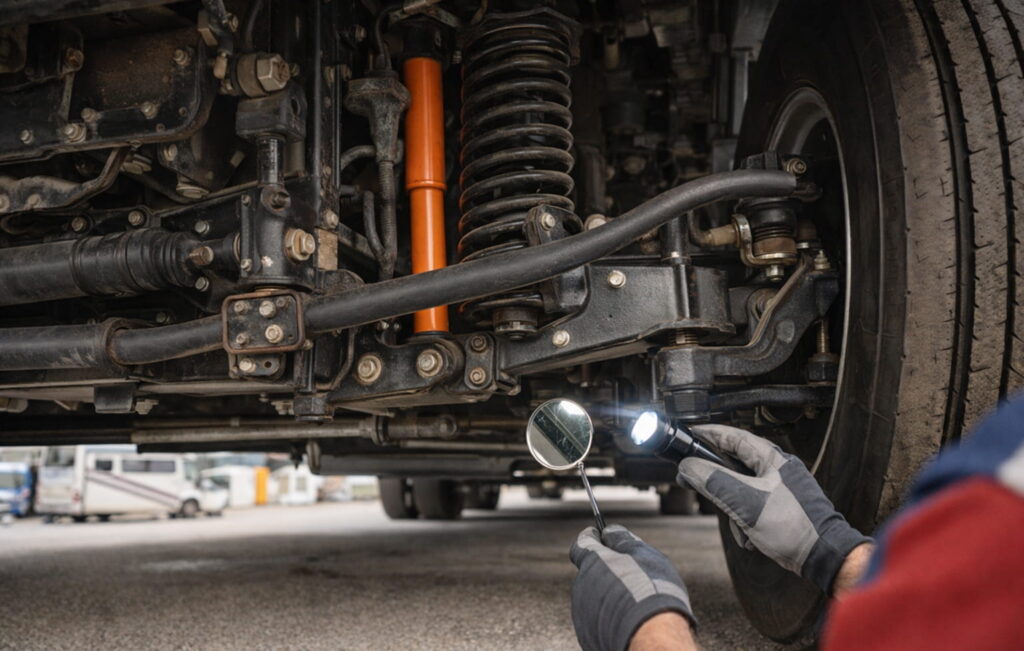
Suspension and steering checkpoints
Suspension wear is one of the most common long-term chassis issues because it changes both comfort and safety. The main wear points include:
- springs
- shackles
- bushings
- shocks
- airbags, if equipped
Look for leaking shocks, cracked rubber, missing grommets, worn bushings, pinched airbags, and uneven ride height. On air ride systems, a coach that sags after parking can point to air loss or tired ride components.
Steering inspection matters just as much. Check the condition of:
- ball joints
- tie rod ends
- drag link
- pitman arm
- sway bar links
- steering gear mounts
Symptoms that often connect to chassis wear include loose steering feel, vibration, sway in turns, and clunking over bumps. If your coach already shows these signs, it may be time for a deeper suspension review. For Houston-area owners, our motorhome suspension repair service is the natural next step when visual inspection lines up with real-world handling issues.
Freightliner’s maintenance schedules specifically call out lubrication and inspection of front suspension, steering knuckles, and other chassis points on many RV platforms, which supports checking these areas regularly rather than waiting for obvious failure.
Brake, axle, and wheel-end inspection points
Brake and axle inspections belong in every chassis review because they carry both load and heat.
Check for:
- brake pad or lining wear
- brake rotor or drum condition
- brake line damage or seepage
- signs of overheating
- uneven brake response
- axle seal leaks
- residue around wheel ends
- visible impact damage at axle areas
On some larger coaches, wheel ends may use oil-bath hubs. If the lubricant level drops or a seal leaks, you can end up with major bearing damage. The older FMCA maintenance guidance for diesel pushers explains that oil-bath hub levels should stay constant and that any drop points to a leak that needs attention. It also notes that wheel seal leaks often show up as splatter or residue at the wheel area.
Brake systems deserve special caution on long-held coaches because inactivity can create its own problems. Sticking calipers, contaminated fluid, and heat damage all show up more often when a coach sits for long periods between uses. That same FMCA maintenance article also notes the importance of regular brake service, lubrication, and fluid maintenance on large motorhomes because weight accelerates wear and heat.
Air systems and ride components on larger motorhomes
Larger diesel pushers often add another layer of inspection: the air system. That includes:
- airbags
- air tanks
- air dryer
- air hoses and valves
Inspect for airbag wear, air line leaks, moisture in tanks, sagging ride height after parking, and service history on the air dryer. This matters even more in humid regions. Moisture shortens component life, and FMCA’s chassis maintenance guidance notes that air dryers and tank draining are key because oil and moisture contamination can damage rubber components and valves in the system.
This is one area where long-term Houston owners should stay proactive. Heat and humidity make it easier for neglected air systems to degrade faster than expected.
Engine bay and driveline items that support chassis health
A good chassis inspection also looks forward into the engine bay and back through the driveline.
Check the engine compartment for:
- worn belts
- old hoses
- dirty filters
- fluid leaks
- coolant residue
- signs of animal nesting
Check driveline and grease points for:
- U-joint wear
- grease fitting neglect
- kingpin lubrication points on solid axle systems
- signs of shaft or support wear
Freightliner’s RV chassis maintenance manual and Ford’s motorhome manuals both reinforce that routine service intervals are the best time to inspect these surrounding systems because that is when the coach is already staged for maintenance and hidden wear is easiest to spot.
Tires are one of the earliest chassis clues
Tire wear tells a story. Long-term owners should pay close attention because tires often show the first warning signs of underbody trouble.
Watch for:
- sidewall cracking
- DOT age
- scalloping
- rivering
- uneven shoulder wear
- recurring pressure loss
- signs of overloading
These patterns can point to alignment issues, suspension wear, frame stress, and poor ride geometry. Even before a driver feels a real handling problem, tire wear can reveal that something is changing underneath the coach.
Ford’s manuals and the broader RV service literature also emphasize the role of correct tire pressure and regular inspection because tire condition directly affects steering, braking, and chassis stability.
How to document chassis wear over time
One of the best habits long-term owners can develop is record keeping. Chassis wear often changes slowly. Notes and photos help you see trends that are easy to miss month to month.
Record:
- date
- mileage
- tire age
- alignment history
- suspension service
- brake service
- leaks found
- rust areas to monitor
- photos of frame rails, mounts, and worn components
This helps in three ways. First, it supports smarter repair decisions. Second, it gives your shop a stronger baseline during future service visits. Third, it adds value if you sell later because documented care builds buyer confidence.
DIY inspection vs professional chassis inspection
There is a clear line between what owners can safely do and what belongs in a professional bay.
Reasonable owner checks include:
- visual frame inspection
- tire condition review
- basic leak spotting
- accessible undercarriage review
- visual airbag and exhaust checks
Professional inspections should handle:
- under-coach lift inspection
- suspension disassembly
- brake component measurement
- steering looseness testing
- frame crack evaluation
- air system diagnostics
For platform-specific guidance, Freightliner owners can use the official Freightliner Custom Chassis RV file library and the direct Freightliner recreational vehicle chassis maintenance manual PDF to review schedules and service categories. Ford-based owners can start with the official Ford F-53 owner manual library and the current Ford Motorhome Guide PDF for chassis-specific reference points and general system orientation.
When to schedule a full chassis inspection
A full chassis inspection moves from “good idea” to “high priority” in these situations:
- before a long trip
- after five years of ownership
- after hitting a major pothole or road debris
- when steering or ride quality changes
- when you see underbody scraping, leaks, or rust progression
It also makes sense after a long storage period or before you put serious miles on the coach again. If you pair a detailed underbody review with a broader coach-level safety process, use our 15-point RV safety inspection checklist to make sure the rest of the vehicle gets the same attention.
Protect the part of your RV that carries everything
A coach can look clean, dry, and well-kept above ground while wear develops below. That is what makes chassis inspection so important for long-term owners. Frame rails, mounts, suspension points, and undercarriage systems do not ask for attention in obvious ways until the wear is already affecting ride quality, steering, braking, or tire life.
The owners who keep RVs the longest usually learn the same lesson: the chassis rewards regular attention. Small cracks, loose mounts, minor leaks, and underbody scrapes are easier and cheaper to fix when found early.
If your motorhome is past the five-year mark, or if the ride no longer feels the way it used to, make chassis inspection part of your regular service routine. Combining your own visual checks with a professional under-coach inspection is one of the best ways to protect safety, value, and confidence on the road.