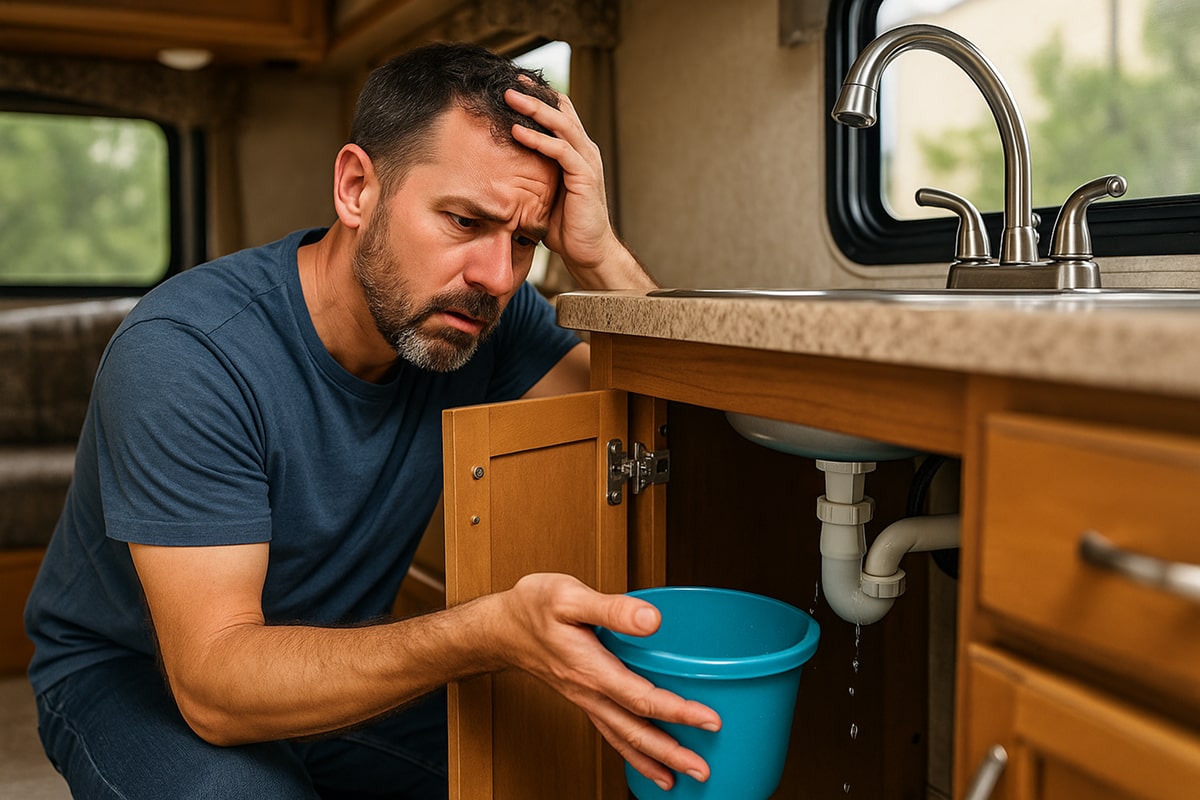
Water leaks in an RV can start small but lead to major damage. A loose fitting, cracked pipe, or worn seal can ruin cabinets, floors, and walls before you even see the first drip. Understanding how to find and fix leaks early protects your RV’s plumbing system and prevents costly water damage.
At TX RV Repair Shop in Houston, we diagnose and repair leaks in RVs, campers, and emergency rigs daily. Here’s what every RV owner should know about spotting hidden leaks and deciding when to call a professional.
Common Causes of RV Plumbing Leaks
RVs use lightweight plumbing systems designed to handle vibration, pressure changes, and temperature swings. Over time, those stresses lead to wear. The most frequent causes include:
- Loose fittings: Movement from driving loosens threaded or crimped joints.
- Cracked PEX or vinyl lines: Age, freezing, or over-tightened fittings can cause splits.
- Damaged seals: Faucets, toilets, and water heaters rely on seals that can dry out or warp.
- Poor factory connections: Some newer RVs were built with flexible vinyl tubing on fittings made for rigid PEX, creating slow leaks at junctions.
A single drip can waste gallons of water and cause hidden moisture under flooring or inside wall cavities.
How to Detect a Plumbing Leak in Your RV
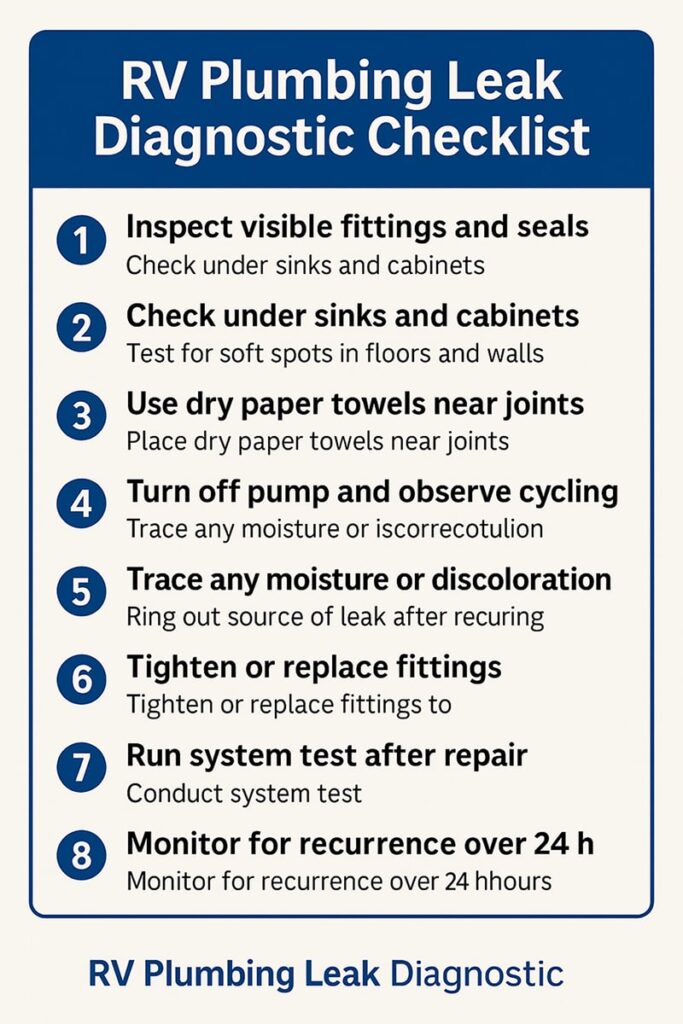
1. Start with a Visual Inspection
Look under sinks, around toilets, and near the water heater for moisture, rust, or staining. Examine fittings and valves for cracks or mineral buildup.
2. Use Paper Towels
Wrap paper towels around suspect fittings. If one becomes damp, you’ve found the source.
3. Listen for the Pump
If your RV’s water pump cycles on and off while no faucet is open, water is escaping somewhere in the system.
4. Check for Soft Spots or Musty Odors
Soft flooring, warped panels, or a mildew smell suggest water is pooling where you can’t see it. These are strong indicators of hidden leaks behind walls or under cabinetry.
5. Monitor Water Pressure
A sudden drop in pressure can signal a leak between the water tank and your fixtures.
Common Leak Locations
- Under sinks and behind showers – loose fittings and cracked drain traps
- Water heater connections – aging O-rings or faulty valves
- Toilet base and seal – dried gaskets or cracked bowls
- Freshwater and wastewater tanks – cracked seams or fittings
- Pump and filter assembly – worn hoses or clamps
A small leak in these areas can lead to delamination, where moisture separates the RV wall layers. Learn more about this issue on our RV Delamination guide.
Repairing a Leak: Step-by-Step
1. Turn Off the Water Supply
Switch off the water pump or disconnect from shore water before starting repairs.
2. Tighten or Replace Fittings
Use a wrench to snug any loose fittings. Replace cracked or worn parts with compatible RV components.
3. Seal Minor Leaks
For small drips, apply an RV-grade plumbing sealant as a temporary fix. Plan to replace the part soon.
4. Repair Damaged PEX Lines
- Cut out the damaged section using a PEX cutter.
- Insert a new fitting and secure it with a PEX clamp or crimp ring.
- Test for leaks before closing panels.
5. Address Flexible Hose Leaks
If your RV has clear or milky flexible lines, ensure the correct fittings and clamps are used. Many leaks occur where vinyl tubing is paired with fittings made for rigid PEX. Professionals can replace these connections with 1/2-inch barb fittings and Oetiker ear clamps for a secure seal.
DIY Fix or Professional Repair?
When You Can Handle It Yourself
You can often tighten fittings, replace simple seals, or patch minor PEX leaks if you have basic plumbing tools.
When to Call a Professional
- The leak is hidden inside walls or near electrical wiring.
- The pump keeps cycling but no visible leaks appear.
- Water damage has softened walls or flooring.
- You suspect a tank or heater issue.
A professional technician uses pressure tests, moisture meters, and ultrasonic detectors to find hidden leaks without tearing apart panels. At TX RV Repair Shop, our trained team also checks for secondary damage like mold growth or delamination.
Preventing Future Water Damage
Routine maintenance prevents most plumbing issues. Use this checklist during each trip or seasonal inspection:
- Inspect under sinks, behind toilets, and around tanks.
- Reseal joints or fittings showing signs of wear.
- Drain and winterize the system before freezing weather.
- Flush tanks regularly to prevent buildup and corrosion.
- Include plumbing in your RV Maintenance Checklist.
If you notice water stains or soft walls, schedule a professional RV Plumbing Repair inspection to prevent hidden damage from spreading.
Protecting Your RV from Long-Term Water Damage
Even a pinhole leak can lead to structural damage if ignored. Moisture trapped behind walls promotes rot, mold, and electrical problems. By acting early, you save thousands in future repairs and keep your RV ready for the road.
At TX RV Repair Shop, we treat every leak as an opportunity to extend your RV’s life. Whether it’s a loose fitting or a full plumbing system overhaul, our Houston team provides honest diagnostics, clear communication, and reliable repairs so you can travel confidently.
Call TX RV Repair Shop in Houston today for professional RV plumbing repair and leak detection. We’ll help you protect your motorhome, camper, or emergency rig from hidden water damage and keep it road-ready for your next adventure.